Getting started
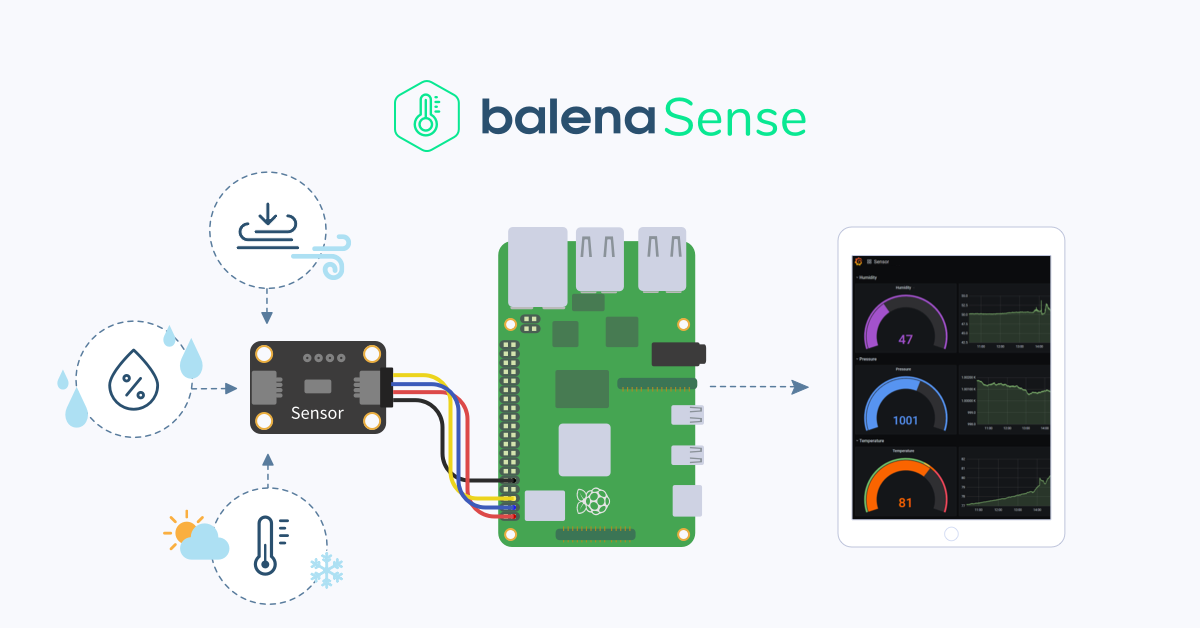
balenaSense is a Raspberry Pi balenaCloud starter project taking readings from sensors, like a Bosch BME680 or similar sensors, storing data using InfluxDB and reporting using Grafana. For a detailed, step-by-step build process, please use the official project guide for balenaSense v2.
This project uses the sensor, connector, and dashboard balenaBlocks to reduce the amount of code you need to manage so that you can simply set up your sensor, send data between sensor(s) and database, and immediately access a customizable, remote dashboard.
Hardware required
Depending if you’d like to crack out the soldering iron or not will dictate what sensor board you can use; some are plug and play, and some require a little soldering.
- A Raspberry Pi 2Bv1.2/3B/3B+/3A+/4B
- 16GB (or larger) Micro-SD Card (we recommend Sandisk Extreme Pro SD cards)
- Power supply and cable
- A compatible sensor such as the BME680 and the necessary connectors, see below:
| Sensor Model | Sensor Name |
|---|---|
| BME680 | Bosch Sensortec BME680 sensor |
| BMP180 | Bosch Sensortec BMP180 sensor |
| BMP280 | Bosch Sensortec BMP280 sensor |
| BME280 | Bosch Sensortec BME280 sensor |
| HTU21 | Measurement Specialties HTU21 humidity & temperature sensor |
| MS8607 | TE Connectivity PHT sensor |
| VEML6070 | VEML6070 UV A light sensor |
Note: we've added a few links to help you shop-- these are not endorsements or affiliated links and are subject to change inventory and availability. Feel free to contribute better links as well.
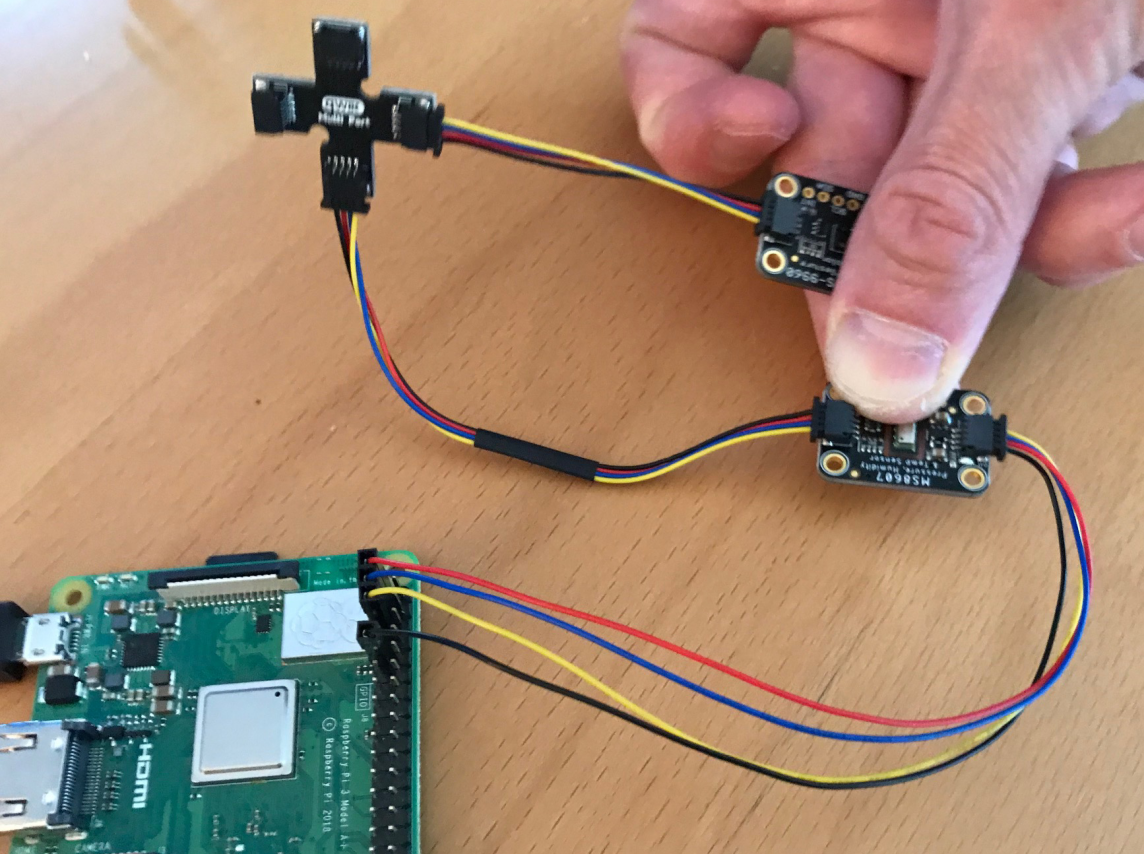
Many of these sensors now include a simple, solderless connector known as Stemma QT or SparkFun Qwiic. They allow you to daisy-chain multiple connectors together on the same device. If you’re using these types of connectors, you’ll want to get at least one cable such as this that terminates in pin sockets you can connect to the Raspberry Pi.
Software required
There are multiple ways to deploy the project to your device. Here's a list of software options. You'll find more information about deploying these options later in this doc.
- adding your device to the balenaSense Open Fleet, where anyone can add a device without a balenaCloud account to try things out
- you can also use the Deploy with balena button below to get started quickly:

Note: You'll have to set up a balenaCloud account to use this method. balenaCloud starter accounts are free and fully supported up to ten devices.
- if you plan on cloning this project and making other changes, you’ll want to install balenaCLI
Whichever method you choose, you'll want a tool to flash the SD card such as balenaEtcher.
Hardware setup
All of the supported sensors utilize a two wire serial communications bus called I2C (“eye-squared-see”), simplifying the connections. Along with the two communication wires, there are also two power connectors for a total of four wires. The diagram below shows the typical color codes (in the arrows) for the wires that connect the sensors to the Pi.
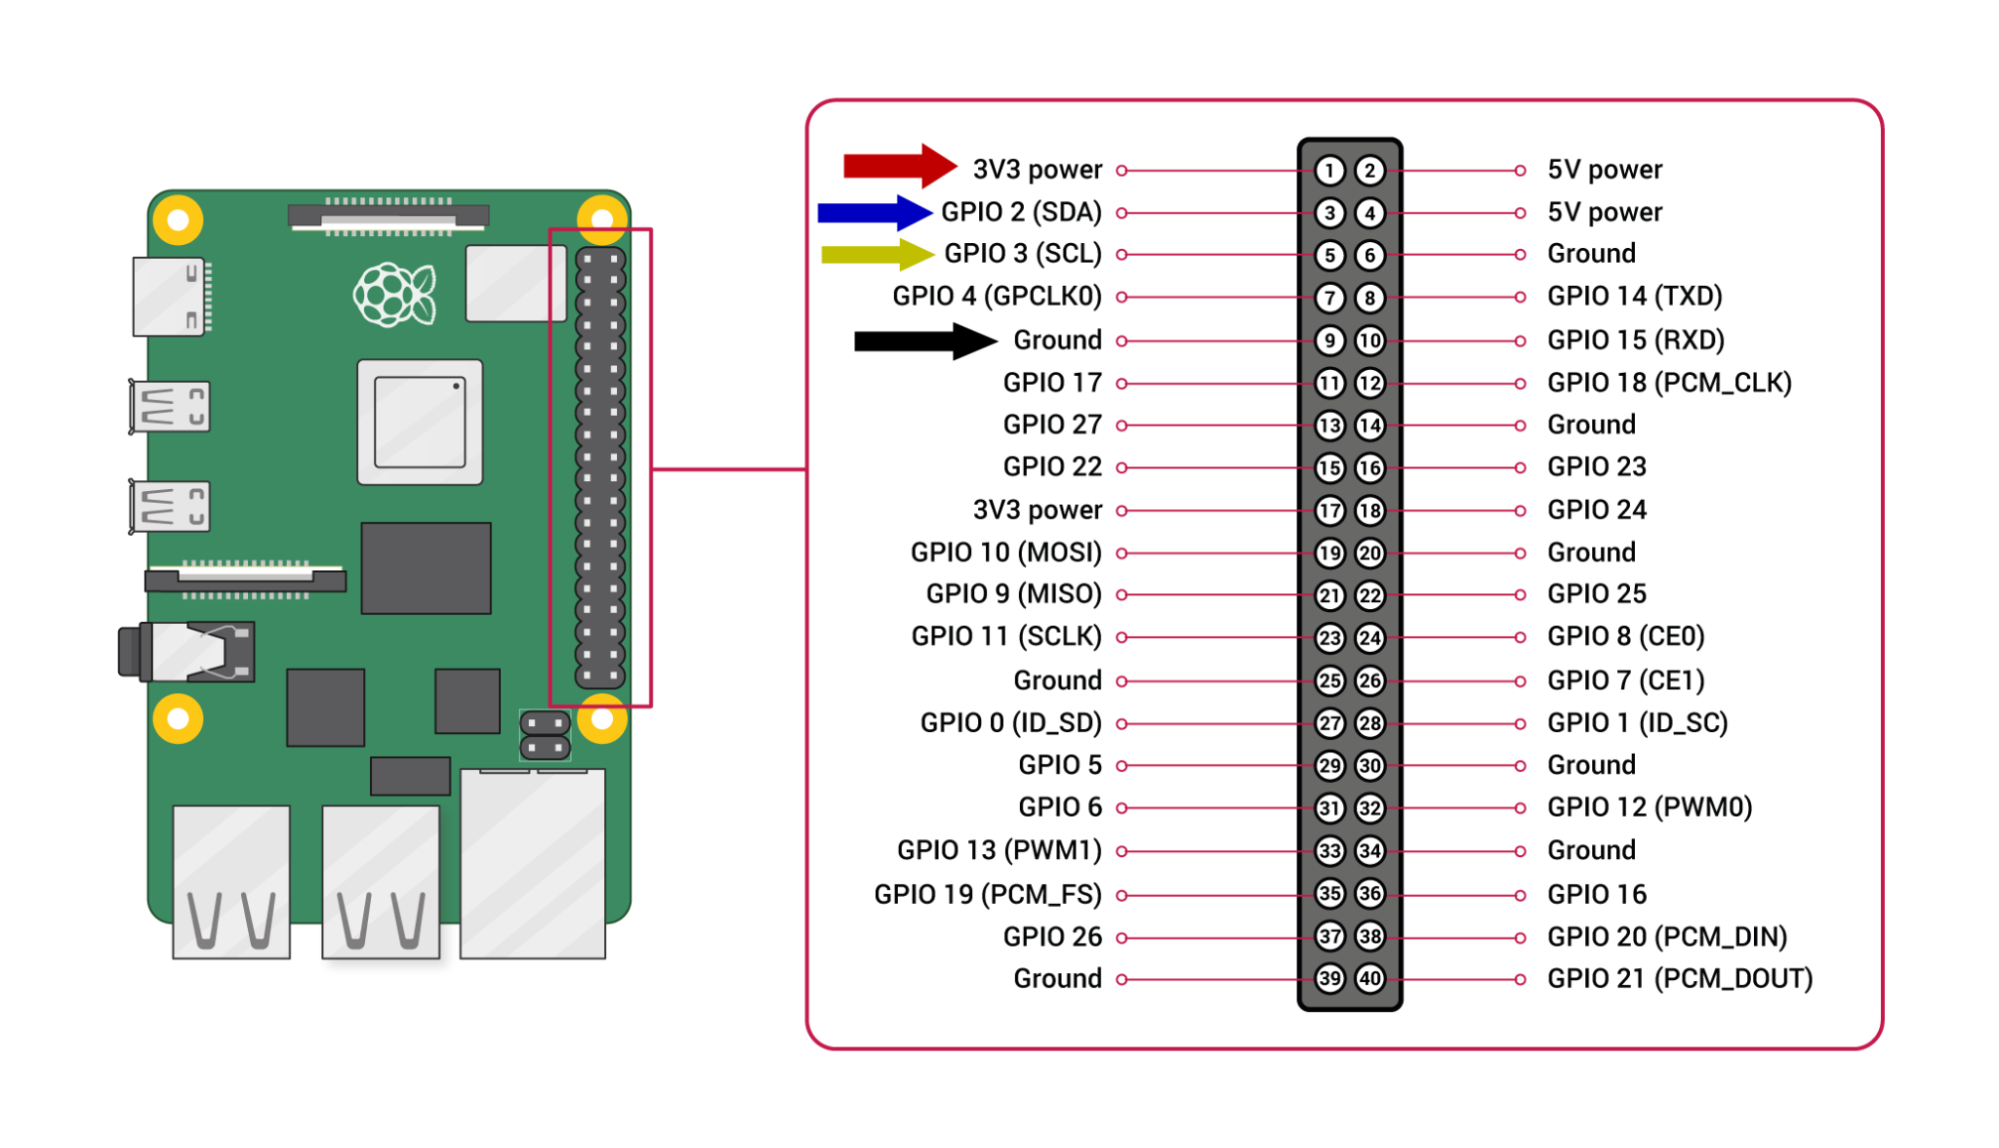
You may find that the SDA pin is sometimes labelled SDI and the SCL pin is sometimes labelled SCK on certain sensors. You can use these pins if SDA and SCL are not available, as long as the sensor is in the list above and supports I2C. You can daisy chain multiple I2C sensors together, as seen in the image above.
If you make your connections manually, just make sure you only connect similar wires together, such as SDA to SDA and SCL to SCL and so on.
Automatically sensing sensors
BalenaSense will automatically scan for connected sensors. Each connected I2C sensor has an address that must be unique. This is usually not an issue unless you connect more than one sensor of the same type. If this is the case, check the sensor’s datasheet to see how/if you can change the address of one of the sensors so they don’t conflict. There’s more information about this in the sensor block’s readme.
Deploying the software
You have three options to deploy the software:
Join our “Open Fleet” for balenaSense
Becoming part of our Open Fleet is the fastest option for getting started, as you don’t need to have a balenaCloud account. Follow the directions here to flash an SD card, insert it into your device, and download and run balenaSense. (For more information about using balenaSense, see the “Device first boot” section below)
Cloning the project (for advanced users)
Advanced users can clone the project from GitHub and use the balena CLI to push the application to their device. This is the best option if you want to tinker with the project and have full control.
Our Getting Started guide covers this option. (Follow the steps below for the third option after you have created an application and pushed the code using the CLI)
Use Deploy with balena
[Sign up] for a free balenaCloud account (your first ten devices are free and full-featured!) and then use the button below to create and deploy the application:

Setup guides
A full guide covering the initial setup of this project is available on our blog.